
This is a copy of my WordPress post, SIMPL# Pro Primer: Part 3. I’m using this to compare code styling between Jekyll/Rogue and WordPress.
By now you should be a pro at creating new SIMPL# Pro projects. Let’s create another one, but we’re going to set this one up slightly different this time. We’ll still call it Part3 but change the solution name to Primer.
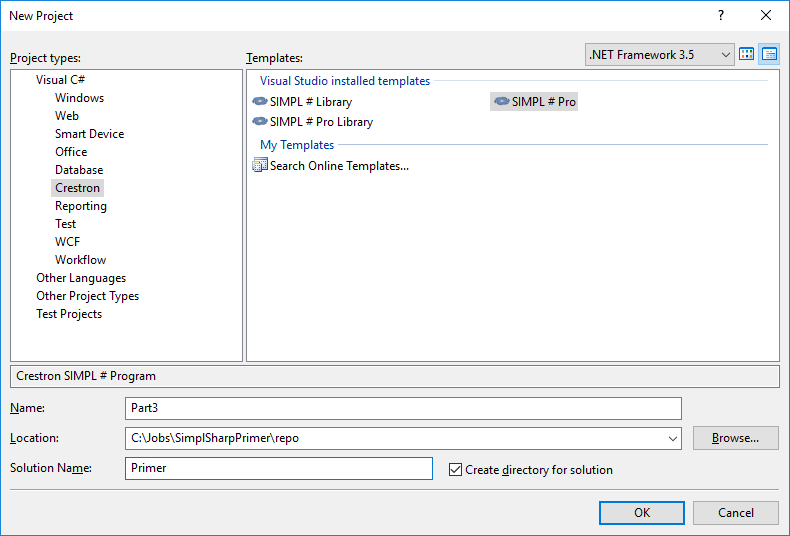 Slight change in project creation, we’ll add everything to the Primer solution from now on
First things first. Let’s strip back our program in ControlSystem.cs to its essentials:
1
2
3
4
5
6
7
8
9
10
11
12
13
14
15
16
17
18
19
20
21
using System;
using Crestron.SimplSharp;
using Crestron.SimplSharpPro;
using Crestron.SimplSharpPro.CrestronThread;

namespace Part3
{
    public class ControlSystem : CrestronControlSystem
    {
        public ControlSystem()
            : base()
        {
            Thread.MaxNumberOfUserThreads = 20;
        }

        public override void InitializeSystem()
        {

        }
   }
}
Remember I said InitializeSystem is one of those methods your program needs to return from quickly? What happens if your program takes too long in this one method? Add the following to InitializeSystem to find out:
public override void InitializeSystem()
{
    Thread.Sleep(60000); // Wait for 60s
}
If you watch in Text Console, you’ll see the program takes about 60 seconds longer to start up now:
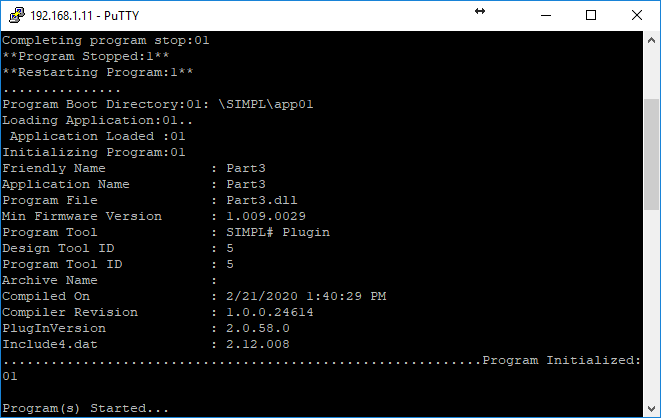
I’ll be honest, I thought taking a full minute to do anything would have locked up the system, but it appears to work just fine. Let’s keep that in mind: if a process may take longer than a minute (say, downloading an entire phonebook), delay that until after the system has started. Otherwise, we can put most things into InitializeSystem.
Let’s imagine a simple system we want to program. Here’s a quick diagram:
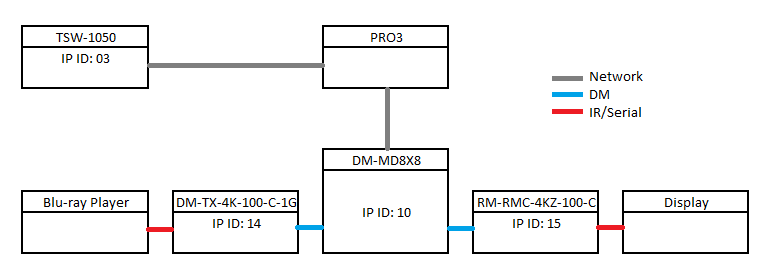
We already know how to add touchpanels to our program, so go ahead and do that now. Add the default SigChange handler as well. Our code should now look like:
1
2
3
4
5
6
7
8
9
10
11
12
13
14
15
16
17
18
19
20
21
22
23
24
25
26
27
28
29
30
31
32
using System;
using Crestron.SimplSharp;
using Crestron.SimplSharpPro;
using Crestron.SimplSharpPro.CrestronThread;
using Crestron.SimplSharpPro.DeviceSupport;
using Crestron.SimplSharpPro.UI;

namespace Part3
{
    public class ControlSystem : CrestronControlSystem
    {
        private Tsw1050 _tp;

        public ControlSystem()
            : base()
        {
            Thread.MaxNumberOfUserThreads = 20;
        }

        public override void InitializeSystem()
        {
            _tp = new Tsw1050(0x03, this);
            _tp.SigChange += new SigEventHandler(_tp_SigChange);
            _tp.Register();
        }

        void _tp_SigChange(BasicTriList currentDevice, SigEventArgs args)
        {
            throw new NotImplementedException();
        }
   }
}
Lets add the DM 8x8 switcher. You’ll need to add a reference to Crestron.SimplSharpPro.DM to your project to access all things related to Digital Media. Just a few updates to our program, and we’ll have the DM-TX-4K-100-C-1G and DM-RMC-4K-100-C added. First, we need to add the appropriate using statements:
using System;
using System.Collections.Generic;                        // Add this
using Crestron.SimplSharp;
using Crestron.SimplSharpPro;
using Crestron.SimplSharpPro.CrestronThread;
using Crestron.SimplSharpPro.DeviceSupport;
using Crestron.SimplSharpPro.DM;                         // Add all of these
using Crestron.SimplSharpPro.DM.Cards;                   // <<
using Crestron.SimplSharpPro.DM.Endpoints.Receivers;     // <<
using Crestron.SimplSharpPro.DM.Endpoints.Transmitters;  // <<
using Crestron.SimplSharpPro.UI;
Next, add some new members to our class:
public class ControlSystem : CrestronControlSystem
{
    private Tsw1050 _tp;
    private Switch _sw;                      // <<
    private List<CardDevice> _inputs;        // <<
    private List<DmcOutputSingle> _outputs;  // <<

    private DmTx4K100C1G _tx;                // <<
    private DmRmc4k100C _rx;                 // <<

    public ControlSystem()
        : base()
    {
Instantiate and register our devices in InitializeSystem. Also add the event handlers.
public override void InitializeSystem()
{
    _tp = new Tsw1050(0x03, this);
    _tp.SigChange += new SigEventHandler(_tp_SigChange);
    _tp.Register();

    _inputs = new List<CardDevice>();
    _outputs = new List<DmcOutputSingle>();

    _sw = new DmMd8x8(0x10, this);
    _inputs.Add(new Dmc4kC(1, _sw));
    _outputs.Add(new DmcCoHdSingle(1, _sw));

    _tx = new DmTx4K100C1G(0x14, _sw.Inputs[1]);
    _tx.OnlineStatusChange +=new OnlineStatusChangeEventHandler(_tx_OnlineStatusChange);

    _rx = new DmRmc4k100C(0x15, _sw.Outputs[1]);
    _rx.OnlineStatusChange += new OnlineStatusChangeEventHandler(_rx_OnlineStatusChange);

    _sw.OnlineStatusChange += new OnlineStatusChangeEventHandler(_sw_OnlineStatusChange);
    _sw.Register();
}

void _tp_SigChange(BasicTriList currentDevice, SigEventArgs args)
{

}

void _sw_OnlineStatusChange(GenericBase currentDevice, OnlineOfflineEventArgs args)
{

}

void _tx_OnlineStatusChange(GenericBase currentDevice, OnlineOfflineEventArgs args)
{

}

void _rx_OnlineStatusChange(GenericBase currentDevice, OnlineOfflineEventArgs args)
{

}
Adding endpoints to our switcher gets a bit weird… we need to tell the program which input and output cards are installed first. Then we can add the DM endpoints to the switcher. Once we register the switcher, all of our endpoints will also register. And here’s where I have to take it on faith that any of this actually works since I can’t test with real hardware.
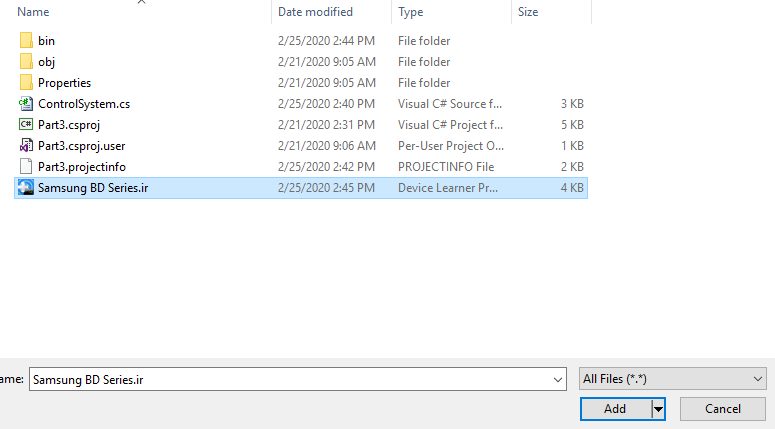
To control the Blu-ray player, we need to load an appropriate IR driver. Lets use a generic Samsung model. I’ve copied the Samsung BD Series.ir driver out of the Crestron database and saved it to the project directory. Right-click on our project and select Add > Existing Item…
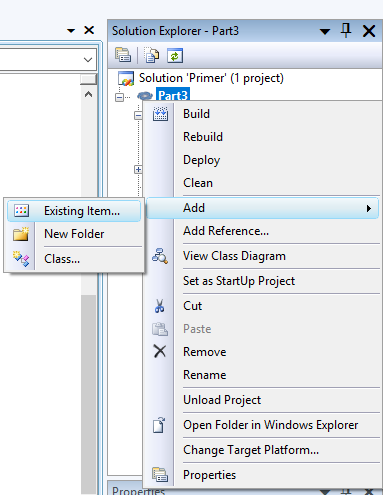
Locate the IR file and add it to your project.
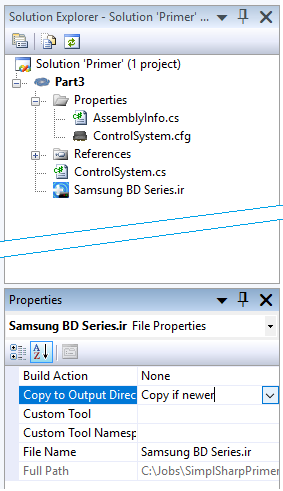
Once it’s added, select it in the Solution Explorer. In the Properties window, make sure Copy to Output Directory is set to Copy if newer.
Build the project (F6) and load it to your processor. It still won’t do anything, but lets see where that IR file gets copied to. Using WinSCP, I found it in /Program01/Samsung BD Series.ir. In order to laod it, we’re going to need to add a new using statement at the top of our program: